Sunday, March 24, 2019

Toyota Hilux - Aluminium Tray Design & Build


 This section gives a summary of the aluminium tray I designed for the ute.  The goal was to create a flat ute tray that contained a large trundle drawer, internal water tanks and battery storage to keep the centre of mass of the camper design to a minimum and utilise as much space under the tray as possible. 


Basic CAD model of the tray and canopy assembly.


View underneath.  The tray was designed to be made from aluminium extrusions and gusset plates that are pop riveted together using multigrip 4.8mm rivets.  The idea was to minimise the use of welding to keep distorsion down and maintain the base metal strength of the aluminium extrusion (e.g. heat treatment).


The CNC router was used to accurately drill as many of the holes as possible to speed up the assembly process.


Finished gusset plates ready for assembly.


A halving joint technique normal used in timber joinery was used in the aluminium extrusion.  with 50% of the holes able to be pre-drilled with the CNC router.


Test fit of the joint.


Assembly of the extrusion sections.


CNC routing the side / tie rail plates from 3mm checker plate.


Cutting the tray topside and pre-drilling all rivet holes.


Rivet holes where counter bored to allow the rivet head to sit flat on the aluminium sheet.


I was very impressed with the hole surface finish using the CAM "Helical Boring" strategy.


Fitting to the ute and assembling the 1400x1100x220mm trundle drawer (made from CNC routered aluminium honeycomb).


Tie rails, tail lights and steel SHS chassis mounts.

Toyota Hilux - Preparations for 2018 Kimberly's Trip


Some of the preperation work and maintenance I undertook on a new vehicle I purchased for a 2 month 4wd expedition through the Kimberly's in Western Australia.


New front wheel bearings, suspension bushes, front diff output shaft oil seals and brake pads.


New timing belt, water pump and idler pulley.


Starter motor rebuild and replacement brushes.


Replaced engine vibration mounts due to cracking rubber on the originals.


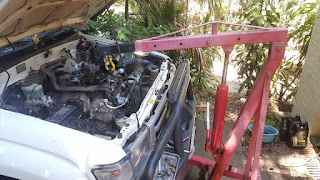
Gearbox has come out to fix a problem with reverse gear.  Also inspection of clutch and replacement of pilot and throw out bearing.


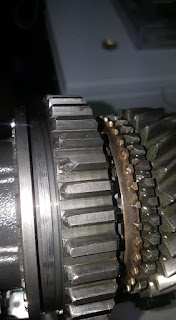
Gear train out for inspection.


The damage reverse gear teeth, also found excessive wear on white metal bushing material for the idler gear, which was out of tolerance.


Complete overhaul with inspection of oil clearance, backlash and run out tolerances.


New coolant pipes and new aluminium radiator.


Ute tub removed, ready for the aluminium tray design and manufacture.

CNC Milling Machine

New Prolight CNC milling machine with automatic tool changer.  


Needs a new spindle motor as the brushed DC 750w motor burnt out the windings and cooked the controller.  So we are going to try and use a 1800w brushless DC hobby outrunner motor.


Its a lot smaller, so i'll be interested to see how the thermal management side of things go.

Stay tuned.

Hydrofoil - Mk1


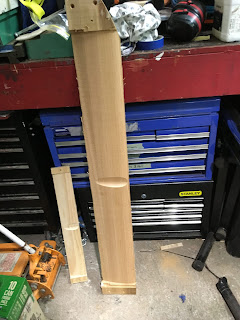
CNC profiled hydrofoil timber blanks (ag24-il section)


Test fitting on the windsurfer board.


Laminated foils with carbon triaxial cloth and epoxy resin.


First test flight - sort of.


Second test flight - sustained for a second or two.


Partially defeated, but still smiling.

Stay tuned for Mk2.

Some Recent Projects


Spanner and tool organisers for an efficient workshop.


Lathe tool organiser


Personalised toy box for a nephew using CNC finger joints and birch plywood.


Flattening red gum tree slab for a friend.  Epoxy resin filled knots and cracks.


Computer monitor stand for my personal computer.

BBQ stand for a family member.


New gear stick knob for the 4WD.


Folding aluminium parts for welding.


Engraved panel for a drinking water plumbing system in the 4WD.


Tuesday, January 2, 2018

Carbon Fibre Wedding Ring

This project was to make a carbon fibre wedding ring for a good mate of mine.

Final Tooling - Ring bore reduced from 19.0mm to 18.5mm ID. Extra length gave more room to manage the fibre on and off the ring mould surface.


Laying the carbon tow in a helical pattern to give an attractive finish on the inside of the ring.

Laminate built up ready to be consolidated

Heatshrink used to compact the laminate and provide an even outside surface finish.

Heatshrink has been shrunk down.

The cured ring was demoulded and setup in a purpose made jig/clamp for holding the ring.

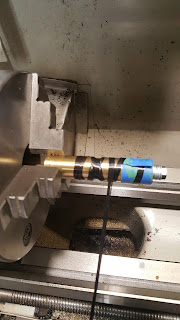
The surface was turned on the lathe to remove excess material and then sanded and hand filed to give the desired outer profile/shape

A layer of epoxy was applied to the outer surface of the ring to be the final finishing surface of most of the ring.

The ring was setup in a rotating axis (4th Axis) on the CNC router to cut the grooves at the appropriate angle.

Cutting to full depth.

Finished groove ready for the gold to be glued in

I bought the gold online in 4.5x4.5mm square wire that gets cut to the length you order. I ordered a 10mm length hoping I could get enough for two rings out of it incase anything went pear shaped

Test fitting the filled down/shaped Rose gold

Test fitting the filled down/shaped white gold.

I used eposy resin to glue the gold in. Once cured I carefully hand shaped the gold with a small file to match the ring shape.

Progressively filing my way down.

Sanding with fine wet and dry sand paper.

All polished up and complete.

All polished up and complete.

I then turned up a pedestal to hold the ring and plaque to glue into the box. 

In hindsight this box was way too big to fit into the best mans pocket, but should work nicely at home.