Monday, July 4, 2016

Making a Fishing Rod Lathe

My cousin is a mad keen fisherman and this is something that we had talked about around the table at family gatherings.  The concept of a fishing rod lathe. 
This is a piece of equipment that is used to rotate a fishing rod blank or a damaged rod to fit the fairleads or eyes on the fishing rod.  The eyes are held on by a whipping then coated in resin.  Ideally the lathe is left spinning while the resin dries to ensure and even and drip free finish.

My design was based around a plywood structure and some cheap components from eBay. 

The chuck, spindle and motor block.

The chuck utilises Tee nuts to secure the chuck jaws.  I had looked at 3D printing a complete 3-jaw scroll chuck, like a typical metal lathe.  But deemed this simple CNC router cut idea to do the job in the time frame.

The shaft is an M12 x 200 hex head bolt.  The hex is bonded into the chuck with "knead it" quick putty from Bunnings.  (The "knead it - steel" is very handy to have laying around).

The spindle runs in deep groove ball bearings which are counter bored into the upright pieces.  The motor is a 60 RPM motor from ebay for about $10.  Then a simple PWM DC motor controller from ebay - $10.

The top roller is spring loaded to make it easy to install the rods.  The middle support also can slide to any point on the base plate so you can place the support next to where you are working.

Wednesday, June 29, 2016

More cutting


Using the router to rebate multiple lengths of timber at once.


New shelving for the shed.


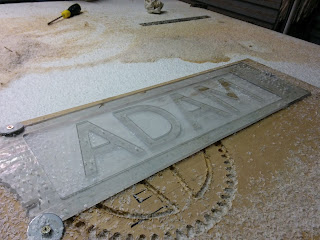
Some decorations for a friends wedding.

cutting

Having a go at 3D profiling.

Roughing pass on polystyrene foam for part of a rudder mould.

Finishing pass

.
Finished profile.

Motors are stable at 60°C


Another crash.  At least we know we can cut at full depth and rapid speeds.

Cutting some panels.

First full panel cuts

Cutting MDF to make a dust collector box.

The cyclone was pretty effective.  Very little dust in the vacuum cleaner, 95% in the bucket. 

Cut panel with tabs left over.

Clamping method.

Putting the box together.

Lining the muffer for the vacuum exhaust with old towels and foam.  The idea is the reduce the noise level in the garage with the vacuum running.

Foam in the box with the vacuum.

Cyclone sits on top and drops the dust into a bucket on the left hand side with the vacuum lives in the right hand side.  This will slide underneath the machine.

New spindle and fitting the bed.

New 2.2 kW water cooled spindle (0-24k RPM)

1/4" Tee nuts used as work holding points on the table,

Using the machine to drill its own holes in the spoil board and base.

tee nuts installed.  Oversize plywood sheet already varnished (3050x1550x18mm)

Cleaning down the frame before applying high strength construction adhesive to secure the base sheet to the frame.  In hindsight this may not have been the best idea as the paint will be the weak link in the bonded joints.  Time will tell. 


Machining the perimeter of the spoil board surface.

Cyclone dust extractor set up.

Surfacing the bed of the machine.

Dust extraction


Our first solution to our dust extraction problem.  Worked a treat, not great having to accelerate the mass around all the time though.

Next step was a simple shop vac cyclone.  about $30-40 on ebay.

Some corrugated tubing, plumbing fittings and a bucket.

Note:  Don't use hard corrugated tubing.  This is the stuff used for irrigation and has a stiff wall.  The hose howled lack a banshee with air flowing through it.  The turbulence from the corrugations must have lined up with the resonance of the wall or something.  The noise was loaded than the cheap router running at 30,000 RPM.

We ended up buying proper soft walled vacuum hose from a woodworking shop that did the trick.

First crash. 

First useful parts.

Monitor stand for my laptop.

Coming together

Simple bracket to attached the X-axis ball screws to the gantry.  Stiff in the X direction, but allow some movement in the Y direction to allow for some miss alignment


3D printed limit switch brackets

First cuts


Cuts acrylic nicely.